Getting any renovation or alteration work around the work can be costly and time-consuming at the best of times, but if you are short on cash and don’t mind doing a spot of DIY work, you could always attempt to do any work yourself.
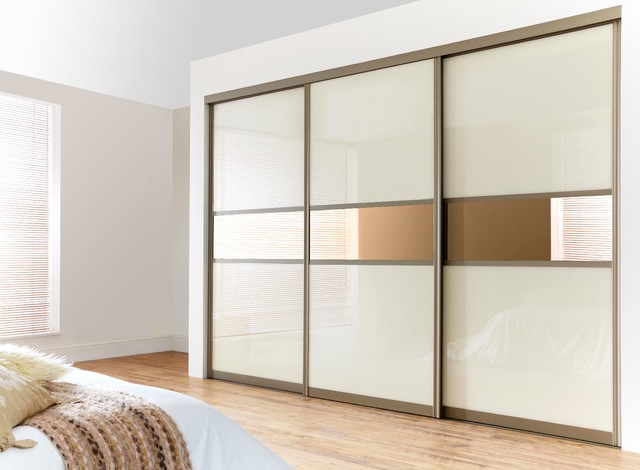
One such example is with fitted wardrobes in bedrooms. Sure, you could buy some cheap freestanding wardrobes instead, but they just won’t look right, and if you have an uneven floor you will find that the doors won’t close properly as they are out of alignment.
Now you might be thinking that fitted wardrobes would cost an absolute fortune to have designed and installed, as you’d have to go to the expense of hiring a designer and a builder, but if you are good at DIY, you own some power tools and aren’t afraid of doing some hard graft, then have you considered building your own fitted wardrobes?
Here is a how-to guide that shows you the basic steps that you need to follow in order to build your very own fitted wardrobes in your bedroom. Obviously bedrooms in each home are going to be of a different size so you will need to make sure that you measure up the space according to your specific requirements.
Things you will need
To achieve an excellent end result, you will need the right tools for the job! In this case, here is what you will need at your disposal:
-
Saw (an electric saw is quicker and easier to work with);
-
Drill (ideally a cordless one);
-
Hammer;
-
Spirit level;
-
Knife;
-
Tape measure;
Additionally, you will need some materials such as wood (for making the studs) and screws. You will also need to plaster your new fitted wardrobe; you can either buy ready-mixed plaster (expensive) or buy a bag of plaster and mix it up with water yourself (cheaper, but requires a special SDS drill with plaster mixing attachment, as well as a flexible builder’s bucket to mix it in).
In either case, you will also need other plastering-related tools such as a trowel, hawk, a board to put some plaster on (if you’ve mixed it yourself) scrim tape and angle bead for achieving straight vertical edges. Finally, don’t forget the plasterboard to go over your studs; otherwise you will have a wardrobe with holes in it, and some paint to finish off the wardrobe!
Designing your fitted wardrobe
The first thing you will need to do is grab your tape measure and make some notes on the measurements for your new fitted wardrobe. Once you are armed with this information, you can then design it either on paper or using a computer program such as Sketchup Make.
You should make sure that your wardrobe is big enough to house a couple of sliding door mirrors (or sliding doors without mirrors if you wish).
Building the frame
Now it’s time to start measuring up and sawing the wood studs to make your frame. Use screws to hold them in place against walls, ceilings and floors. Make sure that your frame is slightly shorter than the height from the floor to the ceiling, or you won’t be able to stand the frame up!
Fitting the plasterboard
You will now need to cut to size and fit the plasterboard to the walls of your frame. When cutting the plasterboard, you only need to use a knife to cut it on one side as you can flip the plasterboard over afterwards and literally snap it in half.
Use scrim tape along the places where you screwed it onto your frame, and angle bead for the corners. You will be plastering over all of this anyway, so you won’t see it in the finished product.
Plastering
Once your frame and plasterboard are in place, the next step is to plaster using your preferred method (ready-mixed or mix-it-yourself plaster). If you are new to plastering, there are plenty of instructions online that show you how to perfect your DIY plastering skills.
Fitting the shelves
After the plaster has been allowed to dry (this could take anything from 24 hours to a week depending on the temperature and weather conditions in your area), you can install your pre-measured shelving inside the wardrobe. Make sure that you have installed some pieces of wood directly onto the walls and studs first so that the shelves can rest on them.
Painting and finishing up
You can now go ahead and start painting the fitted wardrobe, including the sliding doors. Once all of the paint has dried, install your sliding doors. You now have a completed fitted wardrobe – congratulations! They make up part of the fitted bedrooms look in any home so you could carry on and install some more in the other bedrooms in your home thanks to your newly acquired skills!


